Are you ready to learn how to propagate pothos plants and grow your collection? Look no further, as I will guide you through the simple steps of pothos propagation. Whether you’re a beginner or an experienced plant parent, these easy methods will help you expand your pothos collection and fill your home with lush greenery.
Key Takeaways:
- Propagating pothos plants can be done through various methods, including water propagation, soil propagation, layering, and root division.
- Water propagation involves taking stem cuttings with at least one node and leaf, placing them in water, and transferring them to soil once roots develop.
- Soil propagation requires dipping the cut end of the stem in rooting hormone powder and planting it in well-draining soil.
- Layering involves burying a portion of the vine to encourage root formation, and then separating it from the parent plant.
- Root division is ideal for dividing large pothos plants or those growing in overcrowded pots.
- Take safety precautions by wearing gloves and protecting your skin from calcium oxalate, which can cause irritation.
- Sanitize your tools and containers to prevent the spread of diseases.
Understanding Pothos Plant Propagation
To master pothos propagation, it’s important to understand the different methods available and choose the one that suits you best. In the following sections, we will explore each method step-by-step, giving you all the information you need to successfully propagate your pothos plants.
Water Propagation: Growing Pothos from Cuttings
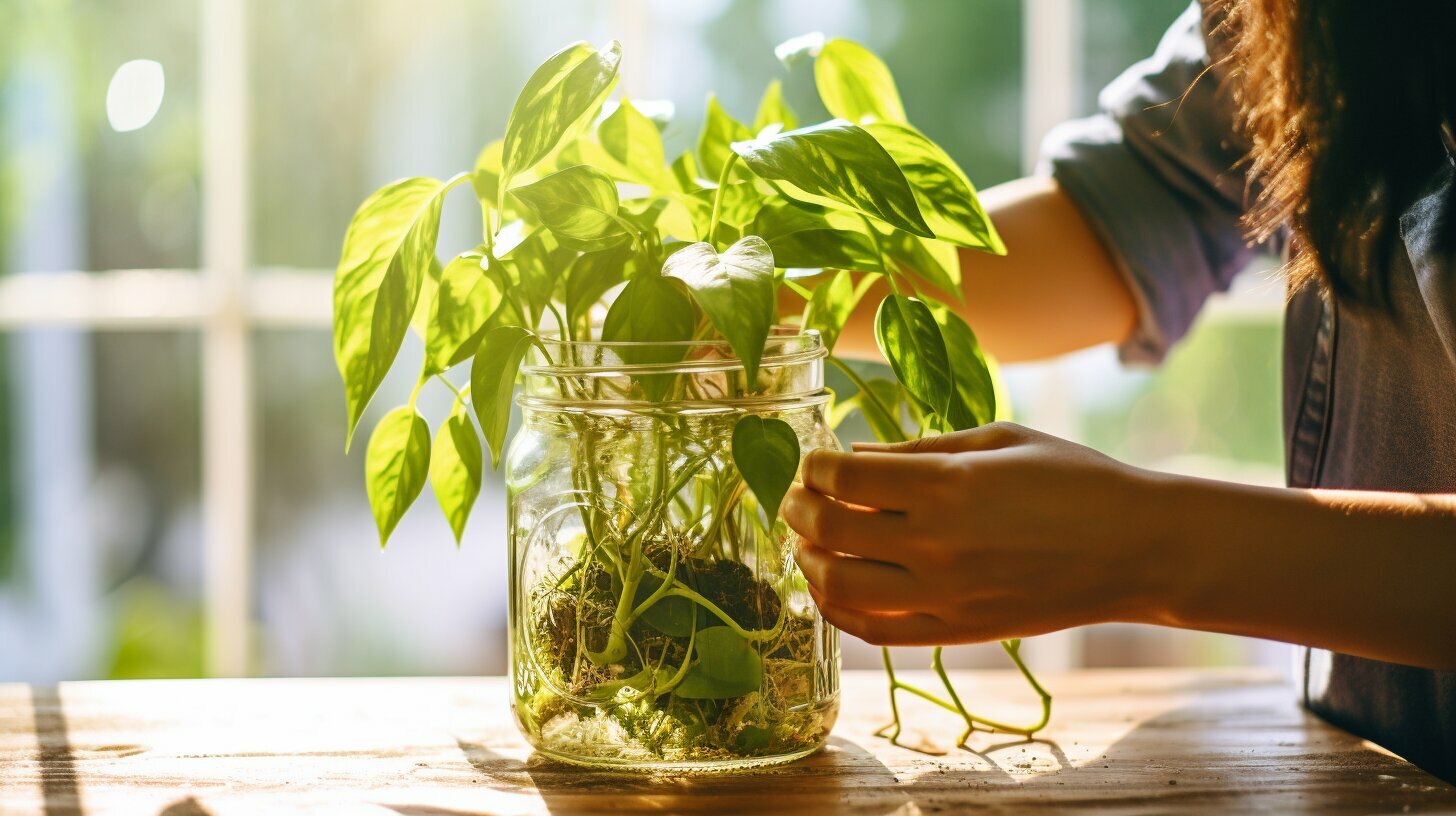
One of the easiest ways to propagate pothos is through water propagation. To start, take stem cuttings that have at least one node and leaf. Place the cuttings in a glass of water, making sure the nodes are submerged. Change the water every few days to prevent stagnation and encourage root development. After about a month, you should see roots about an inch long. At this point, it’s time to transfer the rooted cuttings to soil, where they will continue to grow and thrive.
Soil Propagation: Establishing Pothos in Soil
If you prefer a more traditional approach, soil propagation is a great option. To propagate pothos in soil, start by taking stem cuttings and dipping the cut end in rooting hormone powder. This will help stimulate root growth. Plant the cuttings in a pot filled with well-draining soil, making sure the nodes are covered. Keep the soil consistently moist, but avoid overwatering, as this can lead to root rot. With proper care and attention, your pothos cuttings should develop strong roots and start to flourish in their new home.
Layering: Propagating Pothos by Burying the Vine
Layering is a unique method of pothos propagation that involves burying a portion of the vine to encourage root formation. To layer your pothos, select a section of the vine that is long and healthy. Use a sharp knife or scissors to make a small incision on the underside of the vine, just below a node. Bury the wounded section in moist soil, leaving the rest of the vine exposed. Roots will develop at the buried section, and once they are well-established, you can separate it from the parent plant and have a new pothos to care for.
Root Division: Ideal for Large Pothos Plants
If you have a large pothos plant or one that is growing in an overcrowded pot, root division is an excellent method to propagate new plants. Start by removing the plant from its pot and gently separating the root clusters. Use a clean and sharp knife to make clean cuts, ensuring each division has a healthy root system. Plant the divided sections in fresh pots with well-draining soil and provide proper care to support their growth. Root division is a fantastic way to rejuvenate your pothos and create multiple plants to enjoy or share with fellow plant lovers.
Each pothos propagation method has its own advantages and unique process. Understanding these methods will give you the knowledge and confidence to successfully propagate pothos plants. As you embark on your pothos propagation journey, remember to wear gloves and protect your skin from the irritants in pothos plants. Sanitize your tools and containers with a bleach solution to prevent the spread of diseases. Finally, make sure to use fresh potting soil and provide optimal conditions, including proper lighting, temperature, and humidity, to support the healthy growth of your propagated pothos plants.
Water Propagation: Growing Pothos from Cuttings
Water propagation is a fantastic method to propagate pothos, allowing you to observe the growth of roots firsthand. To get started, select a healthy pothos plant and take stem cuttings that are 4-6 inches long. Make sure each cutting has at least one node and one leaf. Remove any lower leaves to prevent them from rotting in the water.
Next, fill a glass or jar with clean, filtered water and place the cuttings in the water, making sure the nodes are submerged. Keep the glass in a location with bright, indirect light and change the water every few days to prevent stagnation. Within a few weeks, you’ll notice tiny roots starting to form at the nodes of the cuttings.
Once the roots are about an inch long, it’s time to transplant the cuttings into soil. Prepare a pot with well-draining soil and create a small hole to accommodate the roots. Gently place the cutting in the hole, covering the roots with soil and lightly pressing it down. Water the soil to ensure it is moist, but not soaking wet. Place the pot in a location with bright, indirect light and continue to care for the plant as you would any other pothos.
Water Propagation: Step-by-Step Guide
- Select healthy pothos plant and take stem cuttings, ensuring each cutting has at least one node and one leaf.
- Fill a glass or jar with clean, filtered water and place the cuttings in the water, making sure the nodes are submerged.
- Change the water every few days to prevent stagnation and place the glass in a location with bright, indirect light.
- Once roots are about an inch long, transplant the cuttings into well-draining soil, covering the roots and lightly pressing down.
- Water the soil to keep it moist and place the pot in a location with bright, indirect light.
| Pros of Water Propagation | Cons of Water Propagation |
|---|---|
| Easy to observe root growth | Requires regular water changes |
| No need for rooting hormone | Can take longer for cuttings to develop roots |
| Less effort compared to soil propagation | Transplanting to soil can be tricky |
Water propagation is a simple and rewarding way to propagate pothos plants. By following these steps and providing the right care, you’ll have a thriving pothos collection in no time!
Soil Propagation: Establishing Pothos in Soil
Soil propagation is a tried and true method for propagating pothos plants, and in this section, I will guide you through the process step-by-step. This method is perfect for those who prefer a more traditional approach to plant propagation and want to nurture their pothos from the earliest stages of growth.
To begin, you will need a stem cutting from your pothos plant. Make sure the cutting has at least one node and leaf. Dip the cut end of the stem in rooting hormone powder, which will help encourage root development.
Next, select a pot with well-draining soil. Plant the cutting in the soil, making sure to bury the node and leave the leaf exposed. Gently press the soil around the cutting to secure it in place.
Once your cutting is planted, it’s important to provide optimal care. Keep the soil moist, but not overly saturated, as this can lead to root rot. Place the pot in a location with bright, indirect light, as pothos plants thrive in these conditions. You can also cover the pot with a plastic bag or create a mini greenhouse effect to increase humidity and promote root growth.
Remember, patience is key when propagating pothos in soil. It may take a few weeks or even a month for the cutting to develop roots. Be sure to monitor the soil moisture and provide care as needed. Before you know it, your pothos cutting will establish roots and begin to grow into a beautiful new plant.
| Materials Needed | Steps |
|---|---|
| Stem cutting with at least one node and leaf | 1. Dip the cut end in rooting hormone powder |
| Pot with well-draining soil | 2. Plant the cutting in the soil, burying the node and leaving the leaf exposed |
| Water | 3. Keep the soil moist, but not overly saturated |
| Plastic bag or mini greenhouse cover | 4. Create a humid environment to promote root growth |
Layering: Propagating Pothos by Burying the Vine
If you’re looking for an alternative way to propagate pothos without cutting the vine, layering is a technique you should explore. Layering involves burying a portion of the vine to encourage root formation, allowing you to create new plants without separating them from the parent plant. It’s an exciting method that adds a touch of creativity to your propagation journey.
Here’s how you can successfully propagate pothos through layering:
- Select a healthy section of the vine that is long enough to reach the soil.
- Gently wound the section of the vine where you want roots to develop. This can be done by scraping off a small portion of the outer layer of the vine.
- Bury the wounded section of the vine in a small pot filled with moist soil, ensuring that the wounded part remains under the soil surface.
- Secure the buried portion of the vine using U-shaped pins or twist ties to keep it in place.
- Provide the plant with indirect light and keep the soil consistently moist, but not waterlogged.
- After a few weeks, when roots have developed, gently separate the new plant from the parent vine, making sure to keep the roots intact.
- Plant the new pothos in its own pot with well-draining soil, and continue caring for it as you would with any other pothos plant.
Layering is a fantastic way to propagate pothos because it allows you to create new plants while keeping the original vine intact. This method is particularly useful if you want to expand your pothos collection without taking cuttings or if you have a limited number of pothos plants to work with. Layering can be done with both trailing and climbing varieties, so feel free to get creative and experiment with different types of pothos.
| Advantages of Layering: |
|---|
| Allows for the creation of new plants without cutting the vine |
| Preserves the original plant’s structure and health |
| Provides an opportunity to experiment with different pothos varieties |
| Can be done indoors or outdoors, depending on your preference |
Layering is a rewarding propagation technique that adds diversity to your pothos collection. Give it a try and witness the wonders of nature as roots form and new plants emerge from the buried vine. Remember to be patient and provide the necessary care for your new pothos plants as they establish themselves and continue to grow.
Root Division: Ideal for Large Pothos Plants
Is your pothos plant becoming too big for its pot or crowded with other plants? Root division is the solution, and in this section, I will show you how to do it successfully. Root division is an excellent method for propagating large pothos plants or those growing in overcrowded pots. By dividing the roots, you can rejuvenate your pothos and create new plants to share with friends.
To begin, gather the necessary tools: a clean, sharp knife or pruners and a pot with fresh potting soil. Carefully remove the pothos plant from its pot, being gentle to avoid damaging the roots. Once the plant is out of the pot, gently shake off excess soil and inspect the root system.
Look for natural divisions in the root system, where separate clumps of roots can be easily identified. Using the knife or pruners, carefully separate these clumps, ensuring that each division has a sufficient number of healthy roots and leaves. Trim any damaged or unhealthy roots with a clean cut.
Once you have divided the roots, it’s time to replant them. Fill the pot with fresh potting soil, creating a hole large enough to accommodate the separated root clumps. Place each division into the hole, making sure the roots are spread out and covered with soil. Gently press the soil around the roots to secure them in place.
| Tools Needed: | Steps: |
|---|---|
| Knife or pruners | 1. Remove pothos plant from pot |
| Pot with fresh potting soil | 2. Separate root clumps |
| 3. Trim damaged or unhealthy roots | |
| 4. Replant root divisions in fresh soil |
After repotting, water the newly divided pothos thoroughly to help settle the soil and encourage root growth. Place the pot in a bright area with indirect sunlight and ensure the soil remains consistently moist but not waterlogged. Over time, the divided pothos will establish itself and continue to grow, creating a lush and vibrant plant.
Root division is a simple yet effective way to propagate pothos plants and maintain their health. By following these steps, you can successfully divide your large pothos and create new plants to enjoy or share with others. Remember to wear gloves and protect your skin, as pothos plants contain calcium oxalate, which can be irritating. Sanitize your tools and containers to prevent the spread of diseases, and use fresh potting soil to provide optimal growing conditions for your divided pothos plants.
Safety Precautions and Tools for Pothos Propagation
Before you get your hands dirty, let’s talk about important safety precautions and the tools you’ll need for pothos propagation. Working with plants can be enjoyable, but it’s essential to protect yourself and ensure a successful propagation process. So, let’s dive in!
Safety Precautions
When working with pothos plants, it’s crucial to take precautions to protect your skin. Pothos plants contain calcium oxalate, a substance that can be irritating to the skin. To prevent any discomfort, it’s advisable to wear gloves when handling the plants or working with their cuttings. Gloves will provide a barrier between your skin and the plant sap, keeping you safe and allowing you to enjoy the propagation process without any worries.
Additionally, it’s essential to sanitize your tools and containers before use. This will help prevent the spread of diseases or pathogens that can harm your pothos plants. You can sanitize your tools and containers by using a bleach solution – simply mix one part bleach with nine parts water, soak your tools and containers for a few minutes, then rinse them thoroughly. This simple step will help maintain a clean and healthy environment for your pothos cuttings to thrive.
Tools for Pothos Propagation
Now that you’re aware of the safety precautions, let’s discuss the tools you’ll need for successful pothos propagation. Here are the essential tools:
- Pruning shears or sharp scissors: These will be used to take stem cuttings, ensuring clean and precise cuts.
- Rooting hormone powder: This powder promotes root growth and can be applied to the cut end of the stems before planting.
- Glass or vase: If you’re opting for water propagation, you’ll need a glass or vase to hold the cuttings as they develop roots in water.
- Pot and well-draining soil: For soil propagation, you’ll need a pot with drainage holes and well-draining soil to plant the cuttings.
- Watering can or spray bottle: To keep your pothos cuttings hydrated, you’ll need a watering can or spray bottle to provide regular moisture.
With these tools in hand and the safety precautions in mind, you’re ready to embark on your pothos propagation journey. Remember to enjoy the process, be patient with your plants, and soon you’ll witness the joy of new growth and a flourishing pothos collection.
Maintaining Optimal Conditions for Pothos Propagation
To give your pothos cuttings the best chance to thrive, maintaining optimal conditions is key throughout the propagation journey. Whether you’re growing pothos from cuttings in water or soil, providing the right environment will ensure healthy root development and overall plant vitality. Here are some essential factors to consider:
Light:
Pothos plants thrive in bright, indirect light. Place your cuttings in a location where they receive bright, filtered sunlight for a few hours a day. Avoid exposing them to direct sunlight, as it can scorch the delicate leaves. If the light levels are too low, your pothos may struggle to develop roots and grow properly.
Temperature:
Pothos prefers a warm and humid environment. Aim for a temperature range of 70-85°F (21-29°C) during the propagation process. Avoid exposing the cuttings to extreme temperature fluctuations or cold drafts, as it can hinder their growth. If your home tends to be on the cooler side, consider using a heat mat underneath the container to provide gentle bottom warmth.
Humidity:
Pothos cuttings appreciate high humidity levels to encourage root development. You can create a humid microclimate by placing a clear plastic bag or a propagation dome over the cuttings. This helps to trap moisture and create a humid environment. Mist the leaves with water daily to further increase humidity if needed.
By ensuring your pothos cuttings receive the right amount of light, maintaining a suitable temperature, and providing sufficient humidity, you’ll create an ideal environment for successful propagation. Monitor the conditions regularly and make adjustments as needed to ensure optimal growth and healthy root development. Happy propagating!
Troubleshooting and Common Mistakes in Pothos Propagation
Pothos propagation is generally straightforward, but sometimes problems can occur. Let’s explore common issues and how to troubleshoot them.
1. Root Rot: Overwatering is the main cause of root rot in pothos plants. To avoid this, ensure that the soil is well-draining and allow the top inch of soil to dry out before watering again. If you notice yellowing leaves and a foul odor, it may be a sign of root rot. To remedy this, remove the affected portion of the plant, allow the remaining healthy roots to dry out, and repot in fresh soil.
| Symptoms | Treatment |
|---|---|
| Yellowing leaves | Remove affected portion, allow drying, repot in fresh soil |
| Foul odor | Remove affected portion, allow drying, repot in fresh soil |
2. Fungal Infections: Pothos plants are susceptible to fungal infections, especially when grown in humid conditions. To prevent fungal growth, ensure good air circulation around the plant and avoid overwatering. If you notice mold or mildew on the leaves or stems, remove the affected parts and treat with a fungicide spray according to the product instructions.
“Prevent fungal growth by ensuring good air circulation around the plant and avoiding overwatering.”
3. Slow Root Development: If your pothos cuttings are taking longer than usual to develop roots, it could be due to a few factors. Firstly, ensure that you are providing the right conditions for root growth, including adequate light, temperature, and moisture. Additionally, check the quality of your cuttings—make sure they have at least one node and leaf for successful propagation. If all else fails, consider using a rooting hormone powder to stimulate root development.
- Provide adequate light, temperature, and moisture
- Ensure cuttings have at least one node and leaf
- Consider using rooting hormone powder
Conclusion
By being aware of these common issues and knowing how to troubleshoot them, you can increase your chances of successful pothos propagation. Remember to maintain proper watering practices, promote good air circulation, and provide optimal conditions for root development. With a little care and attention, you’ll enjoy the rewarding experience of propagating pothos plants and expanding your green collection.
Conclusion
I hope this guide has empowered you to master the art of pothos propagation. By following these simple steps and understanding the different methods, you can confidently expand your pothos collection and create an indoor jungle that will bring life and beauty to your home. Whether you choose water propagation, soil propagation, layering, or root division, each method offers its own unique benefits and challenges.
Remember to take the necessary precautions when handling pothos plants, as they contain calcium oxalate which can irritate the skin. Wear gloves and protect your skin to avoid any discomfort. Additionally, sanitizing your tools and containers will help prevent the spread of diseases and ensure the health and success of your propagated plants.
Now, armed with the knowledge and skills you’ve gained from this guide, go forth and propagate your pothos with confidence and excitement! Create new plants, share them with friends, and enjoy the rewarding process of watching new roots develop and your pothos collection flourish. Your home will be transformed into a green oasis filled with lush, vibrant foliage.
FAQ
Q: How do I propagate pothos plants?
A: Pothos plants can be propagated through various methods such as water propagation, soil propagation, layering, and root division. Each method has its advantages, and you can choose the one that suits you best.
Q: How do I propagate pothos through water?
A: To propagate pothos through water, take stem cuttings with at least one node and leaf, place them in a glass of water, and change the water every few days. Once roots are about an inch long, transfer the cuttings to soil.
Q: What is soil propagation for pothos?
A: Soil propagation involves dipping the cut end of the stem in rooting hormone powder, planting it in a pot with well-draining soil, and keeping the soil moist. This method helps establish pothos plants in soil from the early stages of growth.
Q: How do I propagate pothos through layering?
A: Layering is a method of propagating pothos by burying a portion of the vine to encourage root formation. To propagate through layering, select the right vine section, bury it, allow it to form roots, and then separate it from the parent plant.
Q: When should I use root division for pothos propagation?
A: Root division is ideal for dividing large pothos plants or those growing in an overcrowded pot. This method involves separating the root clusters to rejuvenate the plant and create new plants.
Q: Are there any safety precautions I should take when propagating pothos?
A: Yes, it’s important to wear gloves and protect your skin as pothos plants contain calcium oxalate, which can be irritating. Additionally, sanitize your tools and containers with a bleach solution and use fresh potting soil.
Source Links
- https://gardenerspath.com/plants/houseplants/propagate-pothos/
- https://www.thespruce.com/how-to-propagate-pothos-5323307
- https://www.instructables.com/How-to-Propagate-a-Pothos-Plant/